This is a tutorial on how to edit Green Screen videos using Sony Vegas. In order to do this, we will be using an effect called Chroma Keyer. Luckily enough, this is a default effect that comes packaged with the software.
The green screen video.
In my case, I have a video of former US president Barack Obama unveiling a portrait.
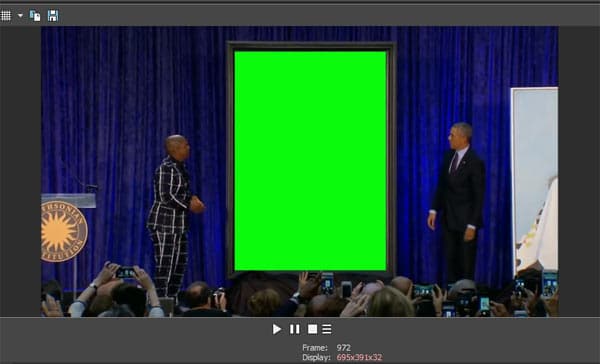
As you can see, the portrait in the screenshot above has been covered over with a section of green screen. This means that I can easily replace this part of the video with any image that I want to.
Step 1. Click on the effects icon on the video track.
Firstly, you will need to open the effects menu for the video track in question.
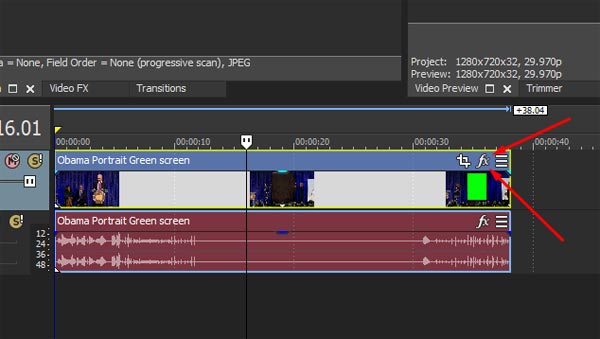
In older versions of Sony Vegas, this effects icon will look different.
Instead of “fx”, the icon will look like this:
![]()
Once you have opened the Video Event FX menu, you will need to find the Chroma Keyer effect.
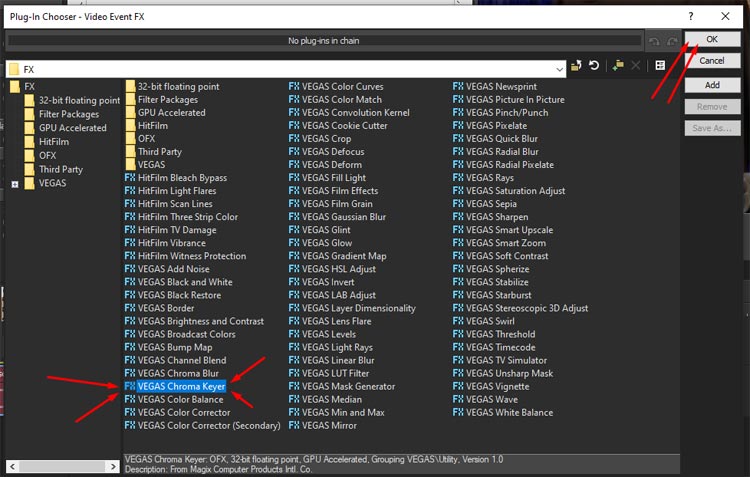
On VEGAS Pro 15, this effect is called the VEGAS Chroma Keyer.
In older versions of Vegas, the effect is called the Sony Chroma Keyer.
However, both of these effects are pretty much the same. They just have different names.
Once you have found the Chrome Keyer effect, select it and then click the “OK” button in the top right-hand corner.
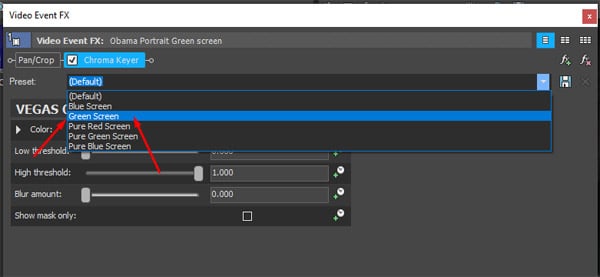
Step 2. Select Green Screen in the preset menu.
After the Chrome Keyer effect menu appears, you will need to open the Preset menu.
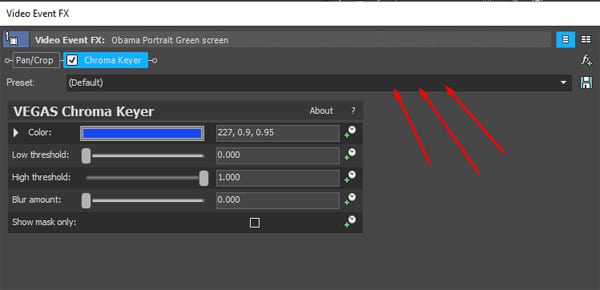
In the Preset menu, you will find an option called Green Screen. Select this option and Vegas will automatically apply the relevant settings.
In most cases, the Green Screen preset will work perfectly fine with the default settings.
However, if you are unhappy with the result, then you can adjust the threshold levels and the blue amount using the slider options.
Step 3. Look at your video.
Once you apply the effect, you will notice that the green section of your video has been replaced by the color black.
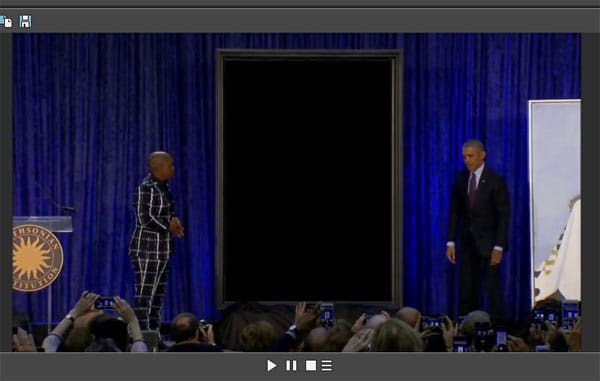
The green section of the portrait is now black.
As a result, you can now drag your image or video and place it under the green screen track.
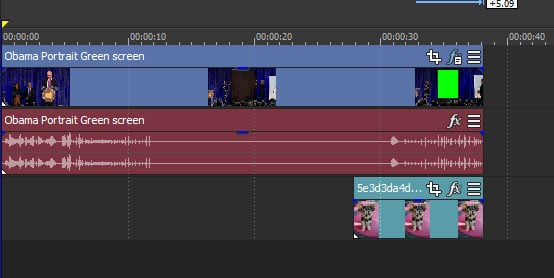
If you look at the screenshot above, you can see that I have placed a photograph of a dog directly underneath the video track that is using the Chroma Keyer effect.
As a result, the photograph of the dog will now appear after Obama unveils the potrait.

Perfect!
And that’s pretty much it. As you can see, the process is actually pretty straightforward.
Be sure to play around with some of the settings to achieve your desired effect.