This is a tutorial on how to upload a file using PHP. In this article, we will create two things:
- The HTML form that will allow the user to select a file to upload.
- The PHP script that will receive the uploaded file, validate it, and then move it to a directory of our choosing.
Let’s start off by creating the HTML form.
The HTML upload form.
Take a look at the following HTML form:
<form action="upload-script.php" method="post" enctype="multipart/form-data">
    <label for="user_file">Please select a file to upload:</label><br>
    <input type="file" name="user_file" id="user_file"><br>
    <input type="submit" value="Upload">
</form>
There are a few important things to note about the form above:
- The enctype attribute on our form element has been set to multipart/form-data. This is extremely important, as our upload form will not work without it. By setting this attribute to multipart/form-data, we are telling the browser that it should not encode the form data.
- The action attribute has been set to upload-script.php. As a result, our HTML form will submit the uploaded file to upload-script.php. i.e. This is the PHP script that we will need to create in order to manage our file upload.
- We set the method attribute to post. This is also extremely important, as it tells our browser that we want to send a POST request. If we fail to set this attribute, the form will send the data as a GET request and our file will not be uploaded.
- We created an input element with type=”file” and named it user_file. This is the form element that the user can click on in order to select a file from their file system.
- Finally, we created a simple submit button.
If you view this form in your browser, you will see that it looks pretty basic:
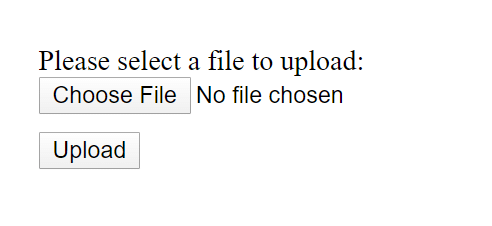
A screenshot of our upload form.
If you choose a file and submit it, you will probably receive a 404 Not Found error for upload-script.php. This is because the PHP file that will handle our upload doesn’t exist yet.
So let’s create it.
The PHP upload script.
In our HTML form above, we set the action attribute to upload-script.php. Now we will need to create that file and insert some PHP code to handle our upload.
Take a look at the following script, which I have heavily commented:
//The folder that our file should be moved to
//once it is uploaded
$uploadDirectory = 'uploads/';

//If our uploaded file exists.
if(isset($_FILES['user_file'])){

    //The extensions that are allowed to be uploaded.
    $allowedExtensions = array(
        'png', 'jpg', 'jpeg', 'csv', 'xls'
    );

    //Get our file details from the $_FILES array.
    $file = $_FILES['user_file'];

    //The name of the file that has been uploaded.
    //Example: image.png or data.csv
    //This is what the user named it.
    $name = $file['name'];

    //Get the extension of the file.
    $extension = pathinfo($name, PATHINFO_EXTENSION);
    //Force the file extension into a lower case.
    $extension = strtolower($extension);

    //If it isn't a valid extension.
    if(!in_array($extension, $allowedExtensions)){
        //Print out a message to the user.
        echo 'That extension is not allowed!';
    } else{
        //If it is a valid extension, move it to our uploads directory.

        //The current / temporary location of the uploaded file.
        //We will need to move it from here to our uploads directory.
        $tmpLocation = $file['tmp_name'];

        //The location that we want to move the uploaded file to.
        $newLocation = $uploadDirectory . $name;

        //Move the file using PHP's move_uploaded_file function.
        $move = move_uploaded_file($tmpLocation, $newLocation);
    }
}
There are a few important things to note about the PHP code above.
The upload directory.
At the top of our PHP script, we set the $uploadDirectory to uploads/. This is the location where our uploaded files will be moved to if the upload is successful. Note that this can be a relative path or an absolute path.
An example of an absolute path:
//Absolute path to our uploads directory.
$uploadDirectory = '/var/www/html/uploads/';
You can also use a relative path to reference a folder in the parent directory:
//Relative path to a folder called uploads in
//the parent directory
$uploadDirectory = '../uploads/';
Currently, our upload-script.php assumes that it is located in the same directory as the uploads folder.
Checking the file extension.
Using a PHP array called $allowedExtensions, we created a whitelist of valid file extensions. This is for security purposes. For example, what if a hacker decided to upload a PHP file?
That would lead to disastrous results, as you’d be giving them free reign to execute their PHP code on your server.
Note that you should feel free to add or remove extensions from this array to suit your own needs. However, I would strongly suggest that you do not remove this file extension check completely.
The $_FILES array.
The $_FILES array is a superglobal array that contains information about any files that have been uploaded to the server. In the code above, we were able to get the details of our uploaded file by using the name of the file input in our HTML form:
//Get our file details from the $_FILES array.
$file = $_FILES['user_file'];
If you take another look at our HTML form, you will see that we gave our upload field the name user_file. As a result, you will need to use that name in order to retrieve the file’s details from the $_FILES array.
Below is a screenshot of a var_dump of the file’s details:

The $_FILES array explained.
FILES: name
The name field contains the name of the file, as it appeared on the user’s file system. For example: In the screenshot above, you can see that the PNG on my file system was called html-upload-form.png.
FILES: type
The type field represents the MIME type of the file that has been uploaded. It is important to note that the MIME type field can be easily spoofed by the client. For example: An attacker could upload a PHP file and manually set the MIME type to a JPEG image.
As a result, you cannot trust this field.
FILES: tmp_name
This is the temporary location of the file. When a file is first uploaded, it is renamed with a .tmp extension and saved in your server’s temporary directory. Therefore, it is up to you to move that file into your chosen directory.
FILES: error
If no errors occur during the upload process, then the error field will be set to 0. Here is a quick drill-down of what each number means:
- 0: No error occurred. The file was uploaded successfully.
- 1: The file was too big and it exceeded the size limit set in the upload_max_filesize directive in your php.ini file. If this is the case, then you might need to increase PHP’s max upload size limit.
- 2: You used the MAX_FILE_SIZE directive in your HTML form and the uploaded file exceeded this limit.
- 3: The file wasn’t fully uploaded. For example: The client’s connection with the web server timed out mid-upload or they navigated away from the page before the upload was complete.
- 4: The user pressed the submit button on your HTML form without choosing a file to upload.
- 6: Your PHP installation has not specified a temporary directory.
- 7: PHP was unable to save the uploaded file to your server’s temporary directory. This could be because the directory isn’t writable or worse, your file system is full or has run out of inodes.
FILES: size
This field represents the size of the file in bytes.
The move_uploaded_file function is safe.
I have seen a few examples where developers have wrapped their move_uploaded_file function inside an is_uploaded_file check:
if(is_uploaded_file($tmpLocation)){
    $move = move_uploaded_file($tmpLocation, $newLocation);
}
Although the above code will work, it is redundant. This is because PHP’s move_uploaded_file function already carries out this check for you. As a result, there really is no need to use the is_uploaded_file function in this case.
PS: If you run into issues with this example not working, then take a look at my article on how to fix a HTML form that is not uploading.
Hopefully, you found this guide useful!