In this guide, we will show you how to convert an MKV file into an MP4 file using the free VLC media player.
This is extremely useful if your television refuses to play MKV (Matroska) files.
Open up VLC media player.
VLC media player is a free and open source media player that is available for Windows, Mac, Linux and a number of other operating systems.
If you don’t already have VLC media player, you can download it from the official website by clicking here.
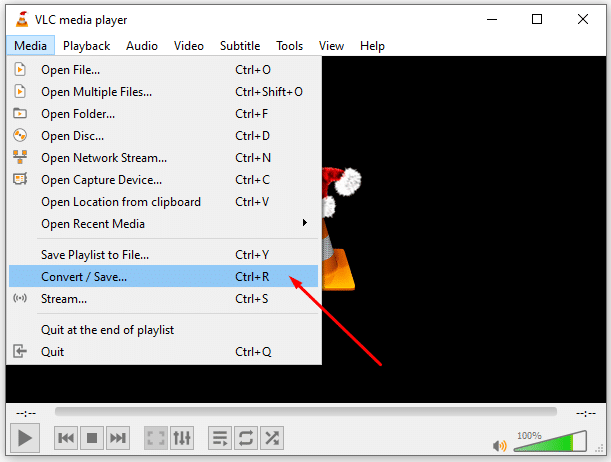
Once you’ve installed VLC media player, open it and click on the Media menu in the top left-hand corner. In the Media menu, you will find an option called Convert / Save.
Click on that:
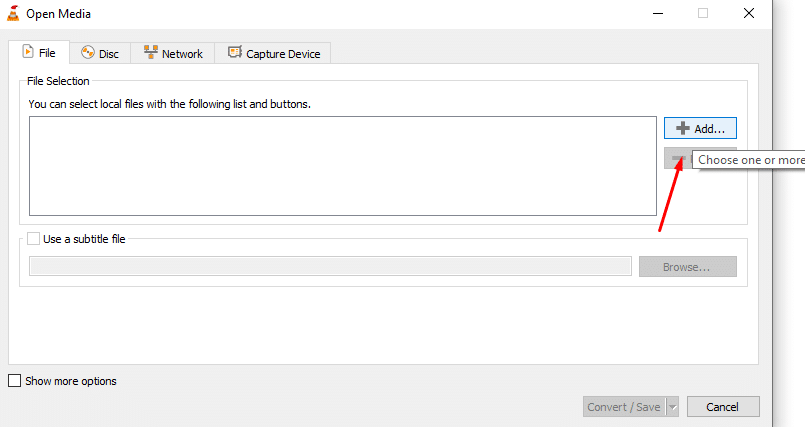
Add your MKV file.
Once the Open Media screen appears, you will need to click on the Add button and select your MKV file:
Once you have selected your MKV file, it should appear in the File Selection list.
In the screenshot below, you can see that I have added a file called sample.mkv:
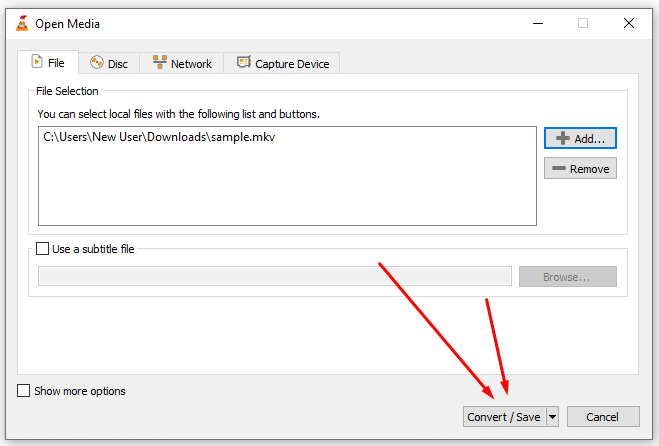
After you’ve selected the MKV file that you want to convert into an MP4, you will need to click on the Convert / Save button.
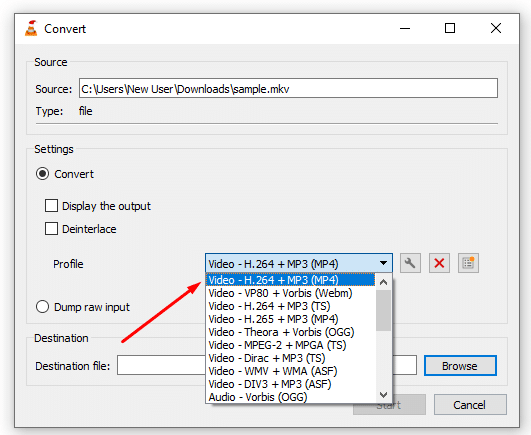
Select the correct Profile.
In the Convert menu, you will find a drop-down box labelled Profile.
In this drop down, you will need to select the Video – H.264 + MP3 (MP4) option.
Take a look at the screenshot below:
Once you have selected Video – H.264 + MP3 (MP4) as the profile, you will need to click on the small wrench icon on the right:
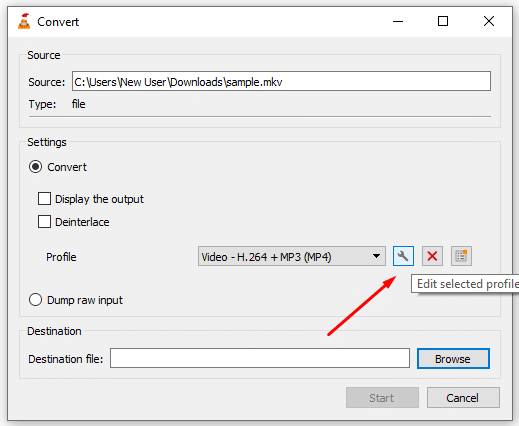
When you hover over the wrench icon, the tooltip text will read “Edit selected profile”.
Profile edition.
Once you have clicked on the wrench icon, the Profile edition screen will appear.
This screen has four tabs: Encapsulation, Video codec, Audio codec and Subtitles.
In the Encapsulation tab, you will need to make sure that MP4/MOV is selected:

In the Video codec tab, you will need to change the Codec drop-down to H-264:

In the Audio codec tab, you will need to change two options.
In the Codec drop-down, you will need to select MPEG 4 Audio (AAC), like I have done so in the screenshot below:
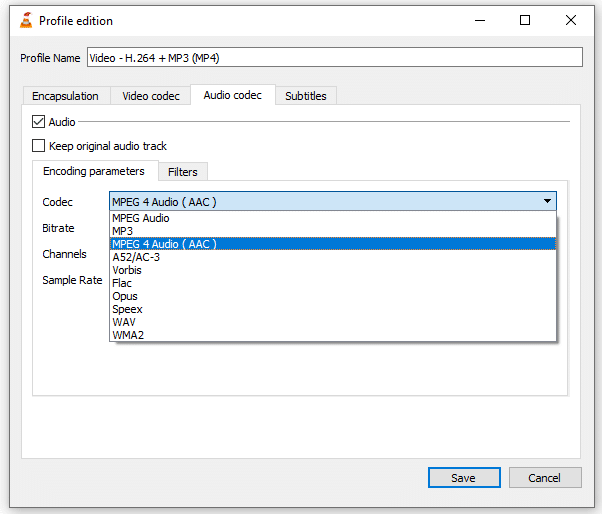
The Sample Rate drop down in the Audio codec tab will also need to be changed to 44100 Hz:

Once you have edited the Encapsulation, Video codec and Audio codec tabs, you can click on the Save option in the bottom right-hand corner:

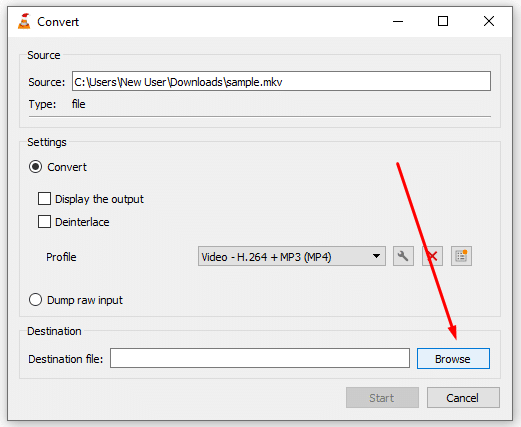
Converting to MP4.
Once you’ve clicked Save on the Profile edition screen, you will be brought back out to the Convert screen.
It is at this point that you will need to select a destination to save your converted MP4 file to.
To do this, click on the Browse button and navigate to the folder that you want to save your MP4 file to:
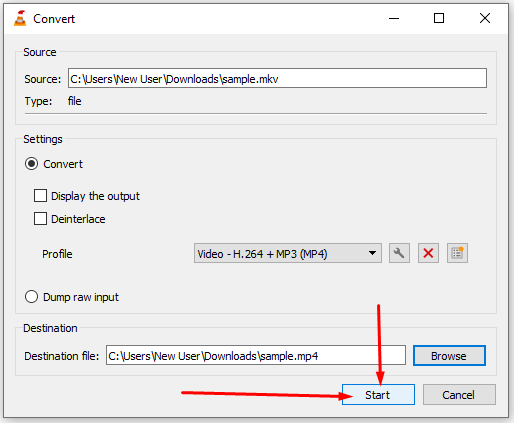
WARNING: By default, VLC media player will keep the same filename and extension:

Therefore, you will need to manually rename the extension of your file to .mp4
For example, in my case, I will change sample.mkv to sample.mp4.
Convert your MKV into MP4.
Once you have finished selecting your destination folder and renaming your file to have a .mp4 extension, you can click on the Start button in the bottom right-hand corner:
Once you have pressed start, VLC media player will begin to convert the MKV file into an MP4. Note that this can be a lengthy process.
There is no quick way to do it unless you have ridiculous specs on your PC.
How long the conversion process takes will depend on a number of factors:
- The length of the movie.
- The size of the movie file.
- Your CPU speed.
- How fast your hard drive’s write speed is.
Basically, you should go and grab a coffee and come back later.
Hopefully, you found this guide useful! Enjoy your movie!