In this tutorial, we will show you how to remove background noise from an audio recording using Audacity.
Background noise can consist of buzzing sounds and other kinds of noise “pollution”. For example, you might have a clock in the background.
These background sounds can make your recording sound amateurish. Therefore, it is always a good idea to remove them.
Although we will be using Audacity 3, these steps will also work on older versions of the software.
1. Record at least five seconds of silence.
When recording, it is always a good idea to start off with at least five seconds of silence.
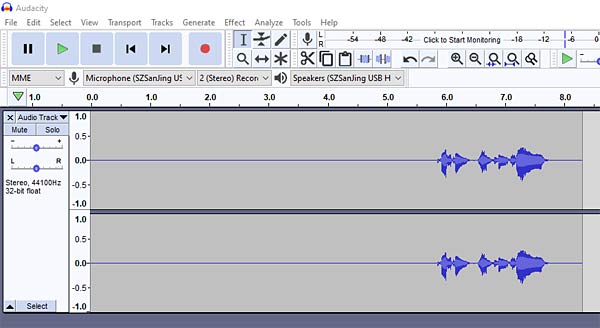
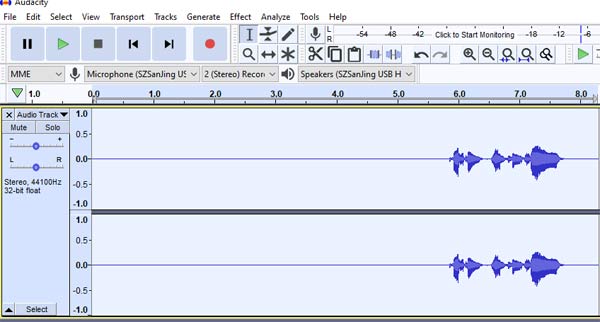
In the screenshot above, you can see that I recorded about 5-6 seconds of silence before I started to speak.
This step is important, as this section of silence will contain the background noises that we want to isolate and remove.
If you do not follow this step, then you will have to find periods of silence elsewhere in the track.
2. Highlight the silence and generate a noise profile.
Firstly, you will need to highlight the silence that you recorded.
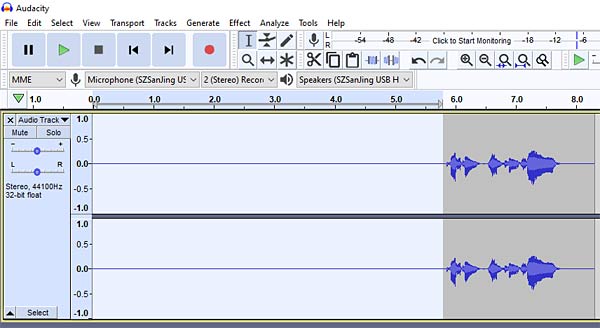
Here, you can see that I have selected the 5+ seconds of background noise that I recorded before I started to speak.
Next, you will need to open the Effect menu at the top and then select Noise Reduction.
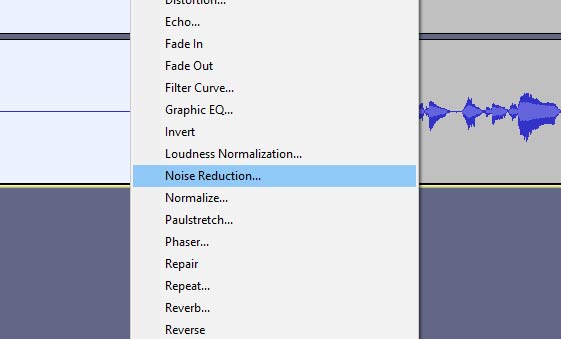
The “Noise Reduction” effect is located just above “Normalize”.
After that, the Noise Reduction menu will appear.
At this stage, you will need to click on the Get Noise Profile button at the top.
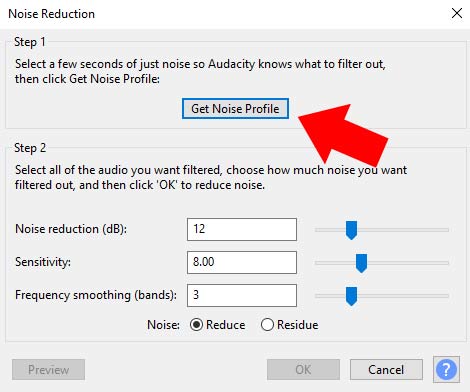
“Select a few seconds of just noise so Audacity knows what to filter out, then click Get Noise Profile.”
Once you click on the Get Noise Profile button, the Noise Reduction menu will automatically close.
Audacity has now generated a “profile” of our background noises. As a result, it will now know which sounds it needs to remove from our audio track.
Step 3. Filter out and remove the background noise.
Now, you will need to highlight the entire audio track.
I have selected the entire track this time, not just the silence.
Once you have highlighted your track, you will need to go back into the Effect menu and click on the Noise Reduction option again.
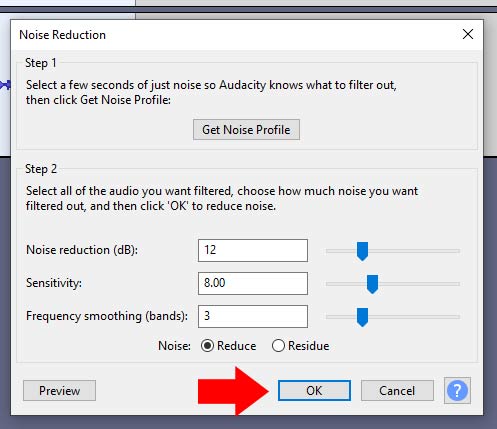
The Noise Reduction menu will appear again.
If you click on the Preview button in the bottom left-hand corner, Audacity will give you a preview of what your track will sound like once the noise profile has been filtered out.
If you are happy with the result, then simply click on the OK button and Audacity will apply the effect.
Otherwise, you can play around with the Noise reduction, Sensitivity and Frequency smoothing options until you have achieved a better result.
And that’s it! Once the effect has been applied, you should notice that the vast majority of background sounds have been removed from your audio. Especially that awful buzzing sound that comes from mics!